The purpose of this project is to build a server that can become a robust and powerful streaming server. The hardware listed in the Hardware Section of this outline is what we would consider as power enough to handle the majority of single server applications. This would be true of a corporate streaming server, or for the purposes of an individual or group wishing to become an independent broadcaster. This is NOT a light duty machine, and therefore will be more expensive than many people will wish to invest. If your needs fall below the capabilities of such a machine, you can scale back the box you are using. Like wise, if your needs are for commercial broadcast, please contact us for specs on a commercial grade multiple CPU stream server.
- The Parts List
- CASE: Antec 1000 Series
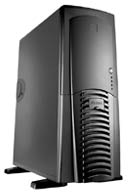 This is a great case and
comes in lots of variations. You can get it in standard
configurations with fans and power supply, or a stripped down box. Check out the
Antec web site at http://www.antec-inc.com for
details and model specs. We chose the 1040B unit in black, with a 400W power supply
and four case fans.
This is a great case and
comes in lots of variations. You can get it in standard
configurations with fans and power supply, or a stripped down box. Check out the
Antec web site at http://www.antec-inc.com for
details and model specs. We chose the 1040B unit in black, with a 400W power supply
and four case fans.  It you are showy in your taste, keep in mind that you can get
power supplies and fans
that light up. Add a plex side panel and you have a show piece server.
It you are showy in your taste, keep in mind that you can get
power supplies and fans
that light up. Add a plex side panel and you have a show piece server.
- Motherboard: Giga-byte GA-7dxr
Photos and specs of the motherboard can be found at the url http://tw.giga-byte.com/products/7dxr.htm. This is a great motherboard, and used a couple of the GA-7 series of motherboards on test systems this past summer. The four key things we were looking for were:- Hardware RAID with 4 on-board IDE controllers
- A Fast Bus including a DDR memory bus
- Support of a Socket A for AMD Athlon� XP
- On Board video and NIC
- CPU: AMD Athlon� XP 1600 or better
Not much more to say on the Athlon, it kicks ass. - Memory: 256 DDR 2100 module
The motherboard has three 2100 DDR slots, so we though that 256 MB was a good starting point. As soon as this machine goes into the role of a production machine, this should be boosted up to a minimum of 500MB of DDR DRAM. - Drive Systems: We set up two separate drive subsystems both on RAID Level One. The volume names and sizes are listed in the OS section to follow. A pair of 20 gig ATA 100 drives were put on IDE 1 and IDE 2; and a pair of 80 GIG ATA 100 drives were put on IDE 3 and IDE 4. NOTE: all Hard drives were set to MASTER. The CD-ROM was set up as SLAVE on IDE-2. The floppy of course was set up on FDC.
- CASE: Antec 1000 Series
- Assembly and Burn In
The system was assembled on the old fashion method of one component at a time and running
POST (power on self test) in between each subsystem or component. We do this because we are
anal about hardware building and using best case methodology. This pays in the long run,
as you will build boxes that run for years without failure. This approach is real important
with a HIGH END motherboard like this one, as it has this fancy new DUAL BIOS
The burn in process seems to also be a lost art for box assembly. we use a couple tools, Micro-Scope Burn-In being one. Unfortunately these tools are expensive, so if you are doing this on your own, you may want to split the cost with a couple friends.
- Laying out RAID The disks are partitioned with /boot, swap, and root raid 1 partitions on the first pair of drives, each 60 gigs, and a /music partition on the second pair of drivesi, each 80 gigs. Each drive is on its own ide controller.
- OS Install The OS is a fairly standard redhat 7.3 install with development tools, webserver and database server options chosen.